

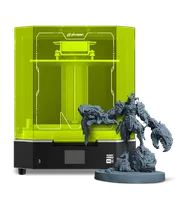
The Phrozen Sonic Mega 8K S is a large-format mono LCD/MSLA resin printer in the prosumer class, built for users who need size and detail to go hand in hand. With a 330 × 185 × 400 mm build volume and an 8K-resolution screen, it prints full busts, cosplay armour and dental models with a precision that FDM cannot approach.
What it is
The Sonic Mega 8K S is a mono LCD printer: a machine that exposes photopolymer resin layer by layer through an 8K mono panel. Unlike FDM, no plastic is extruded: an entire layer hardens simultaneously, producing exceptionally smooth surfaces and sub-100-micron detail. The "Mega" in the name is not marketing: the build volume is among the largest in its class, and the 8K panel ensures those large prints do not lose precision at the edges. It targets artists, cosplay makers, prototyping studios and dental labs that need large-format, high-detail resin printing without compromise.
Technical specifications
| Technology | Mono LCD / MSLA (UV 405 nm) |
|---|---|
| Build volume | 330 × 185 × 400 mm |
| Screen resolution | 8K (7680 × 4320 px) |
| XY resolution | ~43 µm |
| Layer thickness | 0.01 – 0.30 mm |
| Light source | Parallel matrix UV LED (uniform illumination) |
| Class / Price | Prosumer · ~€990 |
Who it’s for
- Large busts and statues: printing full figures and busts at 1:1 or near-life scale without splitting into parts, thanks to 400 mm of Z height (Art and collectible figurines)
- Cosplay armour and props (large-scale helmets, chest pieces and props with cinema-quality surface finish) no visible layer lines (Cosplay and stage production)
- High-detail prototypes: form, fit and aesthetic validation of large consumer products and industrial components at 43 µm XY precision (Industrial design and R&D)
- Dental models and prosthetics: full dental arches, orthodontic models and temporary crowns from biocompatible resin at clinical accuracy (Dental medicine)
Setup and calibration
- Level the build platform against the FEP film of the vat. Uniform contact across the full surface: prerequisite for stable first-layer adhesion.
- Run an exposure time validation print (e.g. Phrozen Exposure Test or a mesh matrix). Optimal exposure time found without over-cure or under-cure for the specific resin and ambient temperature.
- Inspect and replace the FEP/nFEP film of the vat when needed. Clear and taut film without scratches: ensures uniform UV transmission and easy layer release.
- Fill the vat to the resin-level mark and close the lid before printing. Sufficient resin for the full model; the closed lid protects unused resin from UV degradation.
Common defects and fixes
Resin exposure helper
Pick a resin type for starting exposure values (typical for mono-LCD machines). These are STARTING points: always run an exposure test, because the exact seconds depend on your screen power and the specific resin:
Conclusion
The Sonic Mega 8K S is the right choice when size and detail matter equally. The 8K mono panel delivers jewellery-grade precision on a canvas larger than most competitors, and 400 mm of Z height opens the door to full busts and large-format cosplay props in a single print. With correct resin dialling and a maintained FEP film, the machine produces predictable, consistent results: even on the most demanding projects.
The full picture
This article is one page from The Big Book of 3D Printing: 704 illustrated pages covering every technology, material and fix in one reference.
Read it on Kindle →Engineer, author of The Big Book of 3D Printing and additive manufacturing expert