

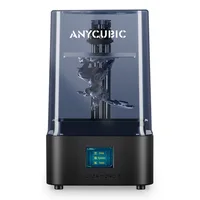
The Anycubic Photon Mono X 6Ks is a large-format mono MSLA printer in the hobby/enthusiast class that brought 6K resolution and a 197×122×200 mm build volume at an accessible price. It is the balanced choice for anyone printing miniatures, jewellery, dental models and detailed prototypes where space and budget both matter.
What it is
The Photon Mono X 6Ks uses a monochrome LCD panel at 5760×3600 (6K) resolution with a 405 nm UV wavelength. Mono panels transmit considerably more light than RGB matrices, allowing short layer exposure times of roughly 1.5–3 seconds while lasting many times longer. The platform has a metal frame with a linear rail on the Z-axis for reduced play. The printer is controlled via a 3.5-inch colour touchscreen and supports ChiTuBox and Lychee Slicer. It targets enthusiasts, miniature collectors, jewellers and dental-model specialists seeking a large print volume with retained detail.
Technical specifications
| Technology | Mono LCD / MSLA (405 nm UV) |
|---|---|
| Build volume | 197 × 122 × 200 mm |
| Screen resolution | 5760 × 3600 (6K) |
| Pixel size | 34.4 µm |
| Layer thickness | 0.01 – 0.15 mm |
| Print speed | up to 80 mm/h |
| Class / Price | Hobby/Enthusiast · ~€330 |
Who it’s for
- Miniatures and tabletop gaming (extremely high detail at 34.4 µm per pixel) ideal for figures, terrain and props at 28–75 mm scale (Hobby and collectibles)
- Jewellery and castable wax models: castable resins and wax blends with zero ash for direct casting of rings, earrings and ornaments (Jewellery and casting)
- Dental models and surgical guides: precise stone-replacement and surgical-guide resins with biocompatible formulas (Dental and medical)
- Detailed prototyping: rapid form and surface-finish validation in product design and ergonomics (Product design)
Setup and calibration
- Level the build plate using an 80 g/m² paper sheet with the FEP vat installed. Uniform slight resistance of the paper across the whole surface ensures adhesion at the FEP bottom.
- Run a bottom-layer exposure test: start at 30–35 s and adjust in 5 s steps. Bottom layers bond firmly to the build plate without excessive adhesion to the FEP.
- Determine normal exposure time using the Resin XP2 Validation Matrix or CHITUBOX Exposure Test. Fine pins (0.3–0.5 mm) and horizontal bridges print without merging or deformation.
- Check resin level: minimum 150 ml in the vat before starting. Sufficient resin prevents dry layers and incomplete curing of the model.
Common defects and fixes
Resin exposure helper
Pick a resin type for starting exposure values (typical for mono-LCD machines). These are STARTING points: always run an exposure test, because the exact seconds depend on your screen power and the specific resin:
Conclusion
The Photon Mono X 6Ks proves that large volume and high resolution are no longer incompatible at a hobby price point. The 6K mono panel delivers 34.4 µm detail with short exposures, while the 197×122×200 mm workspace fits entire battalion scenes or dental arches in a single session. Proper calibration and quality resin are the only variables that determine the outcome.
The full picture
This article is one page from The Big Book of 3D Printing: 704 illustrated pages covering every technology, material and fix in one reference.
Read it on Kindle →Engineer, author of The Big Book of 3D Printing and additive manufacturing expert