

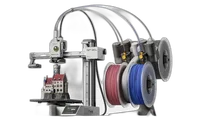
The Prusa MINI+ is a compact open-frame bedslinger printer from Prusa Research with a 180×180×180 mm build volume and a price of around €460. It targets beginners and anyone looking for a reliable second printer for everyday use: backed by the proven Prusa ecosystem, an active community, and minimal hassle.
What it is
The MINI+ is the compact, affordable sibling of the legendary MK4: an open-frame bedslinger design, a magnetic PEI build plate and automatic leveling via the SuperPINDA probe. The machine's obvious constraint is the 180 mm build footprint: for prototypes, educational models and everyday gadgets it is perfectly adequate. It relies on PrusaSlicer and direct-drive filament loading: no AMS, no camera, no enclosure. That simplicity is precisely its strength: the printer runs predictably, rarely breaks down and is easy to maintain even for a beginner.
Technical specifications
| Technology | FDM (bedslinger, open frame) |
|---|---|
| Build volume | 180 × 180 × 180 mm |
| Maximum speed | up to 180 mm/s |
| Nozzle | brass 0.4 mm (standard) |
| Calibration | automatic leveling: SuperPINDA + Live Adjust Z |
| Multi-material | no (single head) |
| Class / Price | Hobby · ~€460 |
Who it’s for
- Rapid prototyping: iterative models for verifying form, fit and ergonomics, suitable for parts up to 180 mm (Product design and education)
- Educational models: physical objects for hands-on STEM learning and demonstrating the fundamentals of additive manufacturing (Education)
- Jigs and fixtures: small, customized tools and alignment guides for assembly or workbench use in low-volume production (Manufacturing and automotive)
Calibration step by step
- Wipe the magnetic PEI steel sheet with isopropyl alcohol (IPA) using a lint-free cloth. An oil-free surface: maximum first-layer adhesion.
- Run the automated Mesh Bed Leveling from the printer's menu. The SuperPINDA probe measures multiple points and builds a topological map: compensating for microscopic bed unevenness.
- Run a First Layer Calibration print and adjust the Live Adjust Z value live while observing the extruded line. The nozzle is at the perfect distance from the bed: flat, bonded lines with no gaps or rough overlaps.
Common defects and fixes
Recommended settings by material
Pick a material to see the recommended temperatures (empirical ranges from 561 OrcaSlicer/Bambu profiles) plus machine-specific tips:
Conclusion
The Prusa MINI+ does not compete on speed or volume: it competes on reliability and simplicity. For a beginner or as a second printer in the workshop, it is hard to find a more predictable and well-supported machine at this price. The small build footprint is its honest constraint; everything else works exactly as promised.
The full picture
This article is one page from The Big Book of 3D Printing: 704 illustrated pages covering every technology, material and fix in one reference.
Read it on Kindle →Engineer, author of The Big Book of 3D Printing and additive manufacturing expert